Author Archives: Vicky

About Vicky

I'm an author and illustrator who has used drawing tablets since the early days. I love how flexible and forgiving they make everything. I'm also fascinated by the technology. I started this site to bring knowledge to everyone. I want this to be the only place you need to go to learn about drawing tablets.

Wacom+Intuos+Pro+Paper+Edition-2

Intuos Pro Paper Edition hits the stands: Hands on

Intuos Pro Paper Edition: Take note

The Intuos Pro Paper Edition is here, joining the ranks of tablets that add real paper and pen to the mix. It comes in only Medium and large, and is a regular Intuos Pro except for the addition of a paper pad and fine-tipped pen.

Like the paperless model, it comes with the Wacom Pro Pen 2, which gets an eye-popping 8,192 levels of pressure sensitivity.

The regular Intuos Pro has also been updated.

Intuos Pro Paper Edition

Intuos Pro Paper and pens. Image courtesy Wacom

New Intuos Pro and Paper Edition features

The new Intuos Pro, including the Intuos Pro Paper Edition (as they’re the same tablet)  is thinner than the old version and has a smaller footprint. The pen stand is now smaller, the pen case is updated. Then nibs sit in the pen holder, which is now flatter and cookie-like.

You also get three Texture Sheets that you can use to get the look of three drawing textures.

The Paper Edition still has touch, the ExpressKeys, and Rocker Ring as controls.

It also includes the 0.4mm Finetip gel ink pen, which is also an EMR pressure-sensitive pen.

Inkscape App

Like the Bamboo Slate and Spark, the tablet comes with the Inkscape app. (Though the app is free to download, eventually it becomes subscription-based).

intuospropapereditionreview

Intuos Pro Paper with Pro Pen 2 and new, thinner pen stand

Besides the gel pen, there’s an optional ballpoint pen. Wacom says that in mid-2017, there’s going to be a pencil option. Yippie! Wonder if it will have an eraser end.

With the app, which works on mobile or desktop, your drawings get digitized and you can store or share them.

intuospropaper

You can use the Paper Clip (that thing on top) to attach your favorite drawing paper to the Intuos Pro Paper Edition. Or you can use the tablet as a regular Intuos Pro.

WIth the paid app, you get 50 GB storage instead of 5; you can convert text to notes, collaborate with others, or turn raster into vector. It costs $3.56 per month as of this writing. The basic app is free and can be used on its Web platform or as an Android and iOS mobile app.

newintuosprogelpen

Intuos Pro Paper Edition Bamboo gel pen

The Intuos Pro Paper now has this whole new functionality. While I like the ink pens, can’t wait for mid-2017 when the pencil comes out in time for summer sketching.

See it on Amazon

Read more about the top Wacom tablets.

Lenovo Yoga_Book_review

Lenovo Yoga Book review

Lenovo Yoga Book Review: Windows and Android

lenovoyogabookreview

A while back, I wrote a fairly detailed Lenovo Yoga Book article when the product was announced, including specs. So here I’ll focus on my experience with it.  I have to say that it was as expected, and in some ways better–it’s a cool and very portable device that delivers in the art area. It comes in both WIndows and Android versions.

lenovo-yoga-book

Lenovo Yoga Book and Real Pen

See the Lenovo Yoga Book on Amazon

The Windows version comes only in black, while the Android Yoga Book’s hues are black, gray, and gold. Perhaps that’s a clue that they expect to sell more of the Android.

Specs

Wacom digitizer, 2,048 levels of pressure sensitivity
EMR pen
100 degrees of tilt sensitivity
Screen: 10.1″ IPS LCD with Lenovo Anypen, multitouch,  HD1920×1200
OS: Android or Windows
Dimensions: 10.1″ × 6.72″ × 0.38″ (256.6 × 170.8 × 9.6 mm)
Build: Magnesium aluminum alloy
Processor: Atom X5, 2.4GHz
Weight: 1.52 lbs (.69 kg)
RAM: 4GB, 64GB storage, microSD can be added
Memory: LPDDR3
Dolby speakers

Comes with:

Yoga Book
Charger
micro USB cord
Documentation
Real Pen
3 ink-cartridge refills
Paper pad with 15 sheets of paper (refill pads have 75 sheets)
Book Pad (metal clipboard accessory)

On Feb. 8, 2017, he A12, a lower-specced, Android version of this was released but it does NOT have a digitizer.

Design

Needless to say, the Yoga Book is really cool-looking and the hinge is beautiful, with a bit of Steampunk sensibility. Lenovo is known for its utilitarian style. Here, the design has lightened and become whimsical.

As with all Yogas, the device bends into myriad poses. The smallness of it makes posing it easier and more fun than with the large ones. The large bezel lets you hold it without touching the screen, and visually sets off the display from its surroundings.

yogabookmodes

Tent pose would be great for showing your portfolio, letting an art director finger-scroll through your work. Or you could prop it on an airplane tray table and watch a movie.

yogabooksize

Ports

There’s a micro-USB and micro-HDMI, a conventional mic-headphone jack, as well as a microSD slot for a card up to 128GB. There’s no USB-C. To use USB peripherals, you will need to provide your own adapter, such as a USB to Go. You won’t be able to simultaneously charge the computer and use a peripheral unless you use a USB hub.

While some people are wishing for more ports, they wouldn’t fit into the skinny tablet body that gives the Yoga Book such great portability.

Display

It’s a bright 400 nits. It’s just HD, but I think at a small size, that matters less than it would at a large size. It also makes the battery last longer. Lenovo reports 70% of Adobe RGB though some places are finding up to 90%. It doesn’t have professional-level color accuracy, but is fine for a digital sketchbook.

You can write or draw on the multi-touch Lenovo AnyPen touchscreen with the stylus tip of the Real Pen, or with anything conducive, from a fork to a banana, because the screen uses Lenovo AnyPen. The one thing that will not work is pure plastic. No matter what, though, you won’t get pressure sensitivity or palm rejection on the screen.

Portability

At about 1.5 lbs., it’s very light and easy to carry in a small bag. The Yoga Book feels more like carrying a paperback book or Kindle with a protective cover. To compare, a 13″ MacBook Air weighs about twice as much. I find my MacBook Air starts to feel heavy after a while so if I have to cover a lot of ground I leave it at home.

Since the Yoga Book is a clamshell, the screen is protected. This means savings, as with an open tablet like an iPad, you have to invest in serious armor or padding.

Comparatively, the large iPad Pro weighs about the same as this, and the small one less than a pound. But then you have to figure in the weight of a case, and the Apple Pencil adds about 3/4 ounce.

Light as the Yoga Book is, though, you also have the paper pad, pen, and additional nib to carry around. There’s no silo for the pen. So having a sleeve that holds everything, and closes would be a good solution.

Lenovo Real Pen

lenovo yoga book pen tips

Yoga Book Wacom EMR Real Pen with stylus tip (top) and ink pen tip

The Yoga Book Real Pen is a batterlyess, Wacom EMR pen with 2,048 levels of pressure sensitivity and 100 degrees of tilt. Lenovo tried over 200 pen designs to get one that fulfilled the Real Pen’s dual functions. While on the large side, the pen is light and comfortable to hold. There’s no eraser tip, so you’ll need to use your program’s eraser brush.

lenovo yoga book pen styluses

If you want to draw for a while on the Create Pad, then change to drawing on the screen, you switch out the nibs, from the digitizer nib to the real ink nib. To switch them out requires using a little hole in the cap to pry out one nib. It’s reminiscent of the hole in the top of the Intuos that you use to pull out nibs.

Notice the fine tip of the top pen, which is the stylus to use on the AnyPen screen. The tip is coated with conduction polyoxymethylene (POM).

yogabookrealpen

Yoga Book Real Pen interior

If you’re a frequent switcher, getting an extra pen isn’t a bad idea. If you don’t like the nib remover you can use a ring one that comes with a Wacom pen. (photo illustration by Lenovo) Or, you can use just about anything to draw on the screen.

 Drawing on the Yoga Book

Here is a super-short pen demo. You can see how the line appears with my pen strokes with no lag. This is just one layer, though. If you have a very large file, you could get some lag as the Atom processor catches up.

Yoga Book Create Pad

The Create Pad is the black drawing tablet. Pushing a button switches it to stylus mode from keyboard mode.

Drawing is where the Lenovo Yoga Book shines. The Creator Pad is very responsive, perfectly mimicking what you draw or write. The Wacom digitizer works great, offering 2,048 levels of pressure and 100 degrees of tilt. There are no hotkeys.

Create Pad with paper pad (right) and color art on the screen (left)

It would be nice if the EMR pen offered nibs other than a ballpoint, but it has to conduct electricity.

There is something nice about getting back to paper.  I found myself keeping my eyes on the paper, whereas with a graphics tablet you have to look at the screen. (Though the new Intuous Pro includes a paper option). If the paper or just the novelty of it inspires you to draw more, than that’s a good thing. You can use any normal paper. To get retro, you could use tracing paper to build up your drawing on paper.

If you didn’t bring paper, you can draw straight onto the Create Pad with no paper. TheCreate Pad is actually the surface of the drawing tablet, not the paper pad. Then you can wipe off the ink. Similarly, you could use the ink pen on the AnyPen screen then wash it off. But I don’t like washing off ink, so I stick to the paper and Real Pen tip.

The ink refills are regular ink refills. You can buy them at stationery stores or from Lenovo or other places.

yogabookkeyboard

Halo keyboard

The keyboard is cool-looking, but difficult to type on, not a whole lot better than texting or typing on an on-screen keyboard. There’s a vibration when you hit the keys. It’s not good ergonomics to type on a flat keyboard. The haptic vibration may help you reflexively not strike as hard, but I’d still be careful and use this just for emails or short items. The size of the keyboard is also challenging to type.

I asked Lenovo if they considered adding more keyboards, such as those for other languages, but they said that wasn’t a possibility right now, since the keyboard is etched in.

Battery Life

Lenovo estimates 12-15 hours, which is really long; realistically, using art apps,. 9 for Windows and 11 for Android. The device doesn’t get very hot.

Art Software

Since the processor is Atom, there’s no point in trying to run heavy-duty programs such as Photoshop or Gimp. You can use them but only in the lightest way before you run into problems.

The Yoga Book comes bundled with a trial of ArtRage Lite, a versatile art program with loads of realistic brushes and effects, even glitter and impasto. It’s a very affordable program to purchase.

Lenovo Yoga Book Windows vs. Android

lenovo yoga book keyboard

Lenovo Yoga Book, Android version

The hardware for both are the same. The one difference you can see is that on the Android, you can’t see the touchpad as well because it isn’t outlined; there are just markings on the corners.

With the Android version you can use any app in the Google Play store, such as Procreate. With Windows, you could use ArtRage desktop, Photoshop Elements, Sketchbook Pro, Mischief, Krita, Sketchable, and other art programs that are not too resource-intensive.

Which is best? If you’re used to Windows, you might want to stick with the familiar. But the Android actually has more going for it. The Yoga Book is a tablet-first laptop. Its specs are low for a Windows machine, but high for an Android tablet.

The Android version lets you use anything in the Google Play store, including Procreate, Sketchbook Pro, Photoshop Express, and tons more. The Android apps are smaller, hence run faster. In the Android you can turn off the screen to save battery while you draw on the Create Pad, with the image still getting digitized.

In the Windows version, there is two-fingered scroll. You will also get Windows Ink and handwriting to text. And you can use Microsoft Office or Open Office. However, if writing is your main thing, I doubt this can replace a full-size laptop.

lenovo yoga book review

Converting handwriting to text on the Yoga Book.

All in all, the Android is  bit better, but there’s not a huge difference, so get whichever one you’re more comfortable with. Just realize that large Windows applications aren’t going to work well. There are Windows mobile apps (the apps formerly known as Metro) in the Windows Store, but nowhere near the amount for Android.

User Reactions

A lot of people are enjoying this tablet. Some Lenovo Yoga Book reviews say the Dolby speakers are louder in the Windows version. Some are also reporting problems with pressure sensitivity in full Photoshop and Corel Draw, but I think those are too large to run on this tablet anyway. The device seems to be sort of “comfort food” for some users.

The biggest sticking points are the trackpad and keyboard.

Pros

Lightness, portability
Multi-positions
Multi-functions
Display
Responsiveness of tablet
Touchscreen
Pen refills are affordable and easy to find

Cons

Typing is difficult
Processor and storage not very high
Create Pad limited to ballpoint pen

The Verdict

The design of the Lenovo Yoga Book is excellent, the hinge is beautiful, and it’s fun to tote around and show off. It’s a neat digital sketchbook, and nice to have a graphics tablet that’s already connected without dealing with cords.

You could get a Wacom Spark for less money if your main goal is to digitize your ink drawings as you draw.  If you want a very portable device to draw and do light typing on, the Book is a fun, versatile digital sketchbook. The main draws for me are the si

What the Yoga Book has done is combine a bunch of functions. Some call it gimmicky, others just enjoy it. I think there’s a bit of that old Apple charm going on here–though it may not give you a ton of power, it’s got a certain charisma and ease of use that’s getting it a lot of fans (and some detractors).

This functions somewhat better with Android, but go with your needs and preferences.

https://youtu.be/HFZJmV_4sbs

This artist, Arthur Walker, has created this great time-lapse video of drawing on the Yoga Book. He has even mastered touch typing.

See the Lenovo Yoga Book  (Android and Windows) on Amazon


Optional accessories include extra paper, ink refills, carrying case.


End of Lenovo Yoga Book review

astropadstudio

Astropad Studio review: iPad Pro meets Mac

Astropad Studio: iPad Pro inches toward Cintiqdom

astropad studio review

Astropad Studio for iPad Pro and Mac. Photo by Astropad


Update, July 2017: Astropad Standard and Studio both work with the new 10.5″ iPad.

Astropad has just released a new product specifically for use with the iPad Pro and Apple Pencil. It’s subscription-based, unlike Astropad Standard, which is still available. Astropad Studio is only for iPad Pro with Apple Pencil, whereas Standard is for iPad2 and up. Whereas Standard is a onetime purchase, Studio is a yearly or monthly fee, and has monthly updates.

Astropad Studio vs. Astropad Standard

Studio has “Liquid Extreme,” which offers a much faster bitrate of 60 frames per second, so less lag. It bas better image quality. Together with GPU acceleration and velocity control, there’s excellent image quality and responsiveness. You can customize program shortcuts in the supported programs, as well as customizing Magic Gestures, which are Pencil/finger combos. If you don’t want to customize, you can use the built-in ones, such as calling up the eraser tool with your finger and the control ring.

Installing both applications is simple, as is the setup. All you have to do get both the Mac and iPad Pro app–the Mac app from the Astropad site, and the iPad Pro app from the App Store.

One nice thing is that you can use the iPad Pro’s USB to connect it to the Mac, instead of Wi-fi, if you’re having Wi-fi issues like I have been lately and can’t get them on the same network.

astropadmagicgestures

Magic Gesture. Photo by Astropad

Once that’s done, you’ll see the controls have three program names–Photoshop, Illustrator, and Clip Studio Paint. These are all popular desktop programs and have a somewhat complex workflow. You can still use Procreate, Sketchbook and any apps or desktop programs you want.

astropad interface

Astropad Interface

The app allows you to customize shortcuts in these programs, which can save a lot of time.

The new improved Liquid Engine is far faster than the old one and I experienced no lag. Lag was an issue for some with Astropad Standard (which is still around).

Astropad Studio is also made to work with any keyboard, so you can use keyboard shortcuts, with one hand on the keyboard and other other on your Pencil.

Magic Gestures are fully customizable and involve that ring, your finger, and the Apple Pencil. Here I’m conjuring the Eraser Tool.

astropad gesture

Using a Magic Gesture while taking a photo of using it (awkward!)

You can move the ring around, press on or hold. Pressing and holding it only brought up the choice of full screen or 100%. But there are ways of setting the amount of screen to use. You can also move and zoom.

You might zoom in on the iPad Pro to work, then zoom out to see the result. I’m not crazy about two screens, and frankly I prefer to just draw on one. But when doing art with a lot of detail, it really helps to see it on a big screen. Seeing art on a big screen not only lets you see any errors you might have made when drawing, and focus on parts individually.

What kind of monthly updates can we expect? According to Astropad, in the works are functions such as a personalized pressure curve. Not sure we can expect such dramatic moves every month, but that’s OK. In a way I like to know what to expect from an app–but this is ready to deliver a lot even if we don’t know exactly what’s in store. (Let’s just hope they don’t keep redoing parts of the UI, a habit that gets to me with Adobe stuff.)

If you’d rather just draw on the iPad Pro alone, Astropad isn’t necessary. But if you want to see your work on a bigger screen, it does get closer to a Cintiq or other graphics tablet. Some might find it doesn’t completely replace a Cintiq, because a Cintiq has that toothy texture, and lets you customize more programs. But the release of Astropad Studio certainly brings a high level of professionalism to the Astropad workflow.

For Windows users, there’s still Duet Display.

Is it worth the extra cost to invest in Astropad Studio over Astropad Standard? The yearly fee right now is about $65, or you can pay monthly and pay a bit more. You get a monthly update with the subscription. I dislike the idea of subscription-based software, but it’s the world we live in. The monthly update assures you’ll be getting the latest features as soon as they come out.

Is Astropad Studio worth the upgrade?

I found Astropad Studio works as advertised. If you’re a frequent use of Astropad with Photoshop, Illustrator, or Clip Studio Paint, I think Studio is worth the extra investment. If you’re using other programs, you might be okay with Standard, which also allows you to use the iPad Pro. I suggest you download the free trial of Studio, or both, and decide.

end of Astropad Studio review

Dell Canvas 27: Hands-on at CES

dellcanvas27review

The new Dell Canvas 27″ tablet monitor, slated to hit the shelves at the end of April 2017, was on display at this year’s CES 2017. I was fortunate enough try it out. It’s the first large art tablet monitor made by Dell.

Dell-Canvas-and-UltraSharp

Dell Canvas 27 (bottom) and Ultra Sharp monitor (top). Photo by Dell

Dell Canvas uses Wacom EMR pen

The Canvas is a bit like a Surface Studio except that the Canvas is a tablet monitor, not a 2-in-1, so it’s more similar to the Cintiq 27″ and has the same resolution. Dell states the Canvas pen is Wacom EMR. (Dell’s recent products have used Wacom AES, and before that they used Synaptics).

EMR is the most sensitive and what Wacom uses on its own Cintiqs. This pen was thick but comfortable and had two buttons. Its girth and simple barrel shape reminded me of pens by Huion more than the skinnier, shapelier pens used by Wacom and Microsoft.

dell-canvas-side-pen-2

It only does Windows

The Canvas has to be connected to a computer, and that computer has to be running Windows. This is a big difference from any other tablet monitor, as most will work with Windows PCs or Macs out of the box. (Maybe Apple will fight back by coming out with its own tablet monitor or all-in-one with Apple Pencil!)

Dell partnered with Microsoft on the Canvas, and the Canvas will work with the Creators Update, and will run with AVID. Dell, naturally, suggests using the Canvas with the Dell Precision workstation, which is powerful enough to create VR content.

The Canvas is protected by Gorilla Glass. It has some cool functions like virtual desktops, and it comes with two kinds of “Totems” (ahem, Surface Dial clones) that you can twist and turn.

dellcanvasoverlay

Display overlay shows open programs. Photo: tabletsforartists.com

Dell’s initial idea was the SmartDesk, where the two monitors would interact, but it’s not clear if that will come to fruition or if it will be the regular routine. In this case, there are actually three monitors–the laptop, the Canvas, and the eye-level monitor.

2.5k display resolution

The display has a 2560 x 1440 QHD resolution (111 PPI). A close competitor would be Wacom’s 27″ Cintiq, with the same resolution (2.5K). The all-in-one, 28″ Surface Studio packs 4500 x 3000 (192 PPI). So the Canvas is pretty high resolution, but it could be higher. However, the 2.5K will have an easier time working with more Windows computers than a 4K or higher would.

The Dell Canvas’ wide color gamut covers 100% of Adobe RGB, which is a welcome feature for pros who print their own work.

Palm rejection worked well. The stand is adjustable, and I like that it can lie flat as a desk, something the Surface Studio’s hinge does not allow.

As you can see, the pen is accurate with no jitter. It also had no detectable tilt sensitivity (which could change) or perhaps there were tilt settings I needed to adjust.

Two Totems for the Dell Canvas 27

To me, two Totems plus the pen and multiple monitors is a lot to think about and the idea of the 20-point multitouch, which can accommodate an extra person or two, starts to seem a bit left-brained. Right now there are not a whole lot of apps for the Totem and Surface Dial, but these are in their early stages.

dellcanvastotemdellcanvastotem√

Totem with contextual menu. The Canvas comes with two kinds of Totems. Photo: tabletsforartists.com

The whole thing is very BUSY pus there are lots and lots of on-screen menus. It’s not exactly Zen, but it offers a lot of options. Right now the levels of pressure sensitivity are not clear, nor are other specs.

For now, my hands-on experience with the Dell Canvas 27 leaves me feeling like it’s not a huge leg up over other 27″ tablet monitors as far as hardware.

The jury’s out on the software, as that’s such a big part of this, and it is impressive. But what are the specific benefits? Do all the accessories and tools make the designer’s workload easier, or is this an exercise in deconstructing and fragmenting workflow?

For most users who draw, having the top monitor is not needed. It looks cool, and there are good reasons to use it, but the Canvas doesn’t need it. For multimedia design, or if you want to make sure colors match, or you want to see your work higher-res, it makes sense. But it’s part of the packaging of the Canvas.

The Verdict–for now

Because at the time of this writing, the product has not yet come out, this Dell Canvas review is focused on testing the pen, examining the screen, speed of the computer, and more. For now, I’m not sold on the Totem/Dial, though that could change, and no one’s forcing me to use it. Microsoft’s Surface Dial is an optional purchase, unlike the two Totems, suggesting that Dell feels they’re integral to the software.

dell-canvas-smartdesk-3

The display is certainly pleasing and I like the idea of the eye-level monitor, though that’s an individual choice. For drawing, I would probably just prop up the Canvas to 20 degrees and use that.

Dell released a lot of innovative and award-getting products at CES, including a super-thin 8k monitor and the Dell XPS 13 2-in-1, which uses Wacom AES.  Dell has put out numerous tablets, but somehow you didn’t hear about them all that much–most of them have been small portables, such as the Venue series. They had a rocky journey with three versions of a Synaptics pen before switching over to AES.

The pen and digitizer information on their site seems to confuse people, as I can tell from the questions I’ve gotten, but this is de rigueur with large companies who didn’t focus on pen tablets. Now, Dell has stepped into the limelight with this large art gizmo.

Now Dell is working with Microsoft and incorporating Wacom, aiming to get in more seriously on the art action. I particularly like the software, such as the overlay, and look forward to seeing the finished product.

ugee-1910b-review

Ugee 1910B review with art tests

Ugee 1910B review with art program testing: affordable 19” tablet monitor delivers

ugee-1910b-review

Ugee 1910b–click image to be taken to the Amazon store in the country you’re in.


Features

19″ display, TFT panel
UC-Logic digitizer (uses EMR)
1440 x 900 resolution
2,048 levels of pressure sensitivity
Battery-free pen recharges from USB. Two pens included.
Pen has eraser/pen toggle button
Adjustable metal stand goes from 90 to about 20 degrees
Compatible with Windows XP on up and Mac. Works with 2d and 3d art software.
Can support dual monitors and has screen mapping
Pen does not have tilt or rotation sensitivity (nor do other Cintiq alternatives)
Pen has eraser/pen toggle button setting
Brightness: 300 nits
Contrast ratio: 800:1
Viewing angles to ~80/~80
5080 LPI (lines per inch)
220 RPS (revolutions per second)
Response time 5 ms

ugee-1910b-review-with pen

Ugee 1910B with pen

What’s in the Box

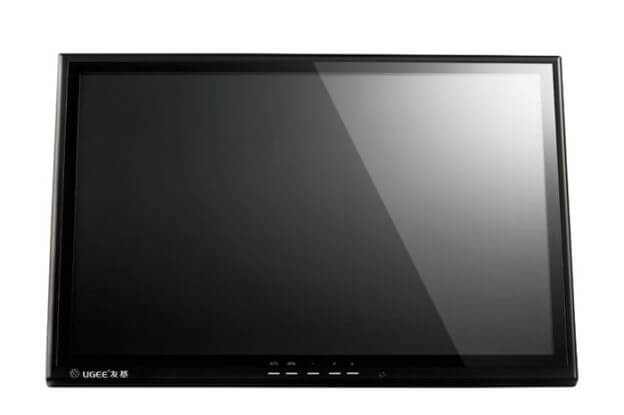
Ugee 1910B tablet monitor
Power adapter and cords: VGA, USB, power supply
Two pens, two pen charging cables
Pen stand
CD with driver
Drawing glove
Screen protector (glossy)
User manual
Pen battery lasts at least 800 hours
Compatible with Windows XP/Vista/7/8/8.1/10 and latest Mac OS

Weight: 15 lbs.
Dimensions: 20.9 x 18.3 x 7.2 inches
Active display area: 19”


Packaging and setup

Ugee is a Chinese company and, like Yiynova, Huion, and others, makes lower-cost tablets that are alternatives to the Wacom Cintiq. This is an an Ugee 1910B review.

This model is among the most economical of the Cintiq alternatives for its size. It’s a tablet monitor that attaches to your computer. It works with Windows and Mac. You can also use it as a regular monitor and attach it to a TV or projector.

This was my first time trying an Ugee.

The tablet monitor came safely packaged in cardboard, with a hard backing, and styrofoam. The inner cardboard box having a handy handle. The packaging is not fancy—it’s no-frills, and the savings are passed along to us.

The boxes open vertically rather than like a clamshell. Inside, along with all the cords, are some nice extras: a drawing glove, screen protector, and extra pen and cord. The screen protector is in a separate package.

Setting up the Ugee 1910B

The USB and cables are each about four feet long, and the power supply about 6 feet long. The power brick is pretty small and compact (about 5” long, 2” wide and 1.5” thick) and stays cool. The pen cords are about 3 feet long.

The cables are relatively simple to set up (no splitters or confusion as to what goes where) and do not produce cord tangle–I was grateful for that. There is VGA, but no HDMI support. You can use a VGA to HDMI adapter if needed.

The cords are in back near the bottom, which makes them a little hard to access, but once set up, they are out of the way both physically and visually. The cords are long enough for me, but it depends on your setup.

You plug the tablet into a wall outlet or surge protector, and connect the 15-pin VGA to your computer or use an adapter for HDMI—most newer computers use HDMI. You also connect the tablet to your computer’s USB tablet, and charge the pen via USB as well.

Installing the Ugee driver

The drivers support Windows 10, even though the info in the paper booklet doesn’t go up that high. The driver comes on an included CD, but I used the ones from the Ugee site. You can use anything from XP to Windows 10. It also works on the latest Mac OSX (and I am checking with the company about older Macs).

You have to delete all tablet drivers and any remnants of them before installing. You connect all the cables, including the USB, with the computer and tablet turned off, then install the driver, then reboot.

Once installed, the driver icon stays in its folder rather than appearing on the desktop, so you need to open the folder and click on it.

If your screen is high-resolution, you will need to set the monitor to Extend mode. If your resolution is the same as or lower than the Ugee’s, then set it to Duplicate. If you are getting a big offset, this setting is the first thing you need to look at.

I tested it using my tablet PC and it worked fine with that; as with other tablets, using a penabled computer does not cause a conflict.

Since I did have remnant files from other drivers, I at first got the dreaded “other tablet drivers detected” error. What solved it for me was going into the Windows folder and deleting two files, a fix I quickly found online after doing a search for the text of the error message. If you have never installed another tablet, then you should not have a problem installing.

The pen calibration and pressure sensitivity worked great out of the box for me and required no adjustments.

Build quality

The Ugee is black plastic and attractively designed. It’s not all that thick, but it feels solid. While it’s not lightweight, it’s not hard, if you’re of average strength, to carry it around the room. I would not want to carry it around town or anything.

Stand

The stand is also plastic (though it resembles metal) and uses a latch system to lock in place. It adjusts from 90 degrees to back to about 20 degrees—which is the best angle, ergonomically, to draw on.

The stand is attached and stable at any position. The tablet is VESA-compatible, so you could use a mounting arm. The tablet sits about two inches off the table surface. The bottom of the stand has four rubber bumpers.

Screen

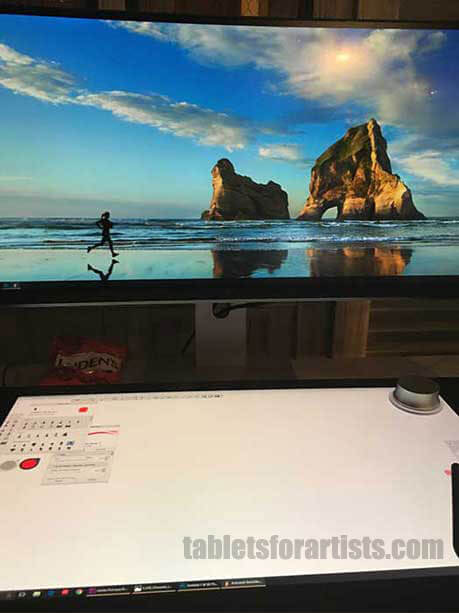
The glossy screen is flat glass all the way up to the ends. There is no raised bezel, only a black frame that’s a bit less than an inch wide, making good use of the screen real estate. You could use a ruler or template on it if you want—makes it easy to make stencils.

Or. if you have done your line art on paper, you can use it as a light box by laying your drawing over it and tracing over it to transfer your drawing, which can be useful in retaining a loose line quality. (You can do this even with a raised bezel, but it’s easier with this flat setup).

The glossiness of the screen makes colors look brighter. Thanks to the flat glass, if you want to use a different screen protector, such as a matte one to get some paperlike tooth, you don’t need to worry about cutting it to fit within the bezel.

The protector covers the active area and a bit beyond. I installed it and got some bubbles that I’m working on getting rid of. The pen doesn’t scratch the tablet if you do not put on the protector, so you may prefer to go bare-screened. If you wear the glove it will stop smudging and moisture. The protector does not affect drawing or the visibility.

There is a slight, very rare squeak with some pen strokes with the screen protector off, but the squeak is a lot less than on some tablet monitors, and it tends to go away after a while—it’s that new-tablet sound.

The display resolution is not high, so things are bit pixelated. Because of the large size, the pixelation is noticeable, and text is a little fuzzy. It’s not lower-res than the Cintiq 12ux or the original iPad, but at this large size, it is more noticeable. This is really my only sticking point. However, higher resolution would mean a higher price and I don’t see it as a dealbreaker. You can still see your art on whatever computer or second monitor you are using.

The viewing angles seem best straight on; this is not an IPS screen. But you don’t get blind spots or anything from other angles, you can see what’s on the screen. If you move around a lot the image becomes a little less clear from certain angles, but chances are you will be drawing from right in front of it. The stand does not swivel, it only goes up and down, the but if you want to turn the monitor it’s not terribly heavy.

Palm resolution works well; I didn’t have any issues with that or the hover distance.

Ugee pen

ugee-1910b-review-pen

Ugee pen

The Ugee pen has a good weight, not too heavy. It’s a little chunky, with a thin part near the tip. It’s thicker than a fountain pen. It’s light enough to not cause fatigue but heavy enough to give a good balance. With my small hands I could stand it to be slightly thinner, but it’s less thick than some of the other tablet pens out there. All in all, I like the pen.

There is a slight parallax (space between pen and screen), but not enough to bother me at all—maybe 1/10th of an inch. In fact I like it seeing the whole line instead of any of it being blocked by the pen.

You will need to use a USB port to charge the pen for about 45 minutes, and a USB cord to connect the monitor. A blue LED light stays on until the pen is fully charged. If you don’t have an extra port, you can charge the pen via a power bank or another device—or simply charge the pen then remove it.

The company says the pen battery lasts a minimum of 800 hours. I haven’t had it that long. There is no need to pair, as no Bluetooth or other wireless signals are involved.

The pen does not have an eraser end but the 3-way button (front, back, and left click) has a pen/eraser toggle and some choices of settings, including and the choice of absolute positioning, or relative (mouse mode).

With absolute mode, the cursor goes where you touch the pen to the screen. I left it on absolute, as it’s desirable for a tablet, unless you have a reason to use mouse mode. The driver also lets you set pen sensitivity and after some testing I put that around the middle, slightly to the harder side.

The Ugee comes with a manual that’s pretty basic and takes you through the steps of installation, settings, and basic troubleshooting.

In Windows 10 you can do a little bit further pen customization by going to Settings > Devices > Pen & Windows Ink.

Drawing on the Ugee 1910B

One happy surprise about UC-Logic drivers is their excellent responsiveness, which I find comparable or better than other digitizers, including Wacom’s. The Ugee’s driver has a comfortable pressure curve and seem to maximize line variation. You can get very thin, interesting lines, similar to using a ballpoint pen.

The driver includes a small test area where you can make adjustments. You can get a very thin line, like drawing with a fine ballpoint pen. Inking feels very fluid.

As mentioned above, there is a small amount of parallax, maybe 1/10” of an inch, with the cursor being a little under the pen. I do not mind this as I like to see where the cursor is. If it were larger, I would mind, but it’s pretty small. I drew around the edges and did not get jitter regardless of speed or direction.

I also did not get lag when drawing, no matter how fast. I did get lag, though if I stopped drawing for a few minutes. Putting the pen back on the tablet apparently wakes the pen up, but sometimes would result in it drawing a random line, which I fixed with a simple Undo command.

The screen is glossy, so colors appear bright and contrast is enhanced. The screen is smooth glass, with no tooth. The included screen protector is also glossy. The protector does not affect drawing.

Controls

You can do monitor mapping with the driver and set up multiple monitors.

Buttons are all along the bottom of the monitor, there are none on the sides. The “menu” button lets you make changes to positioning, color temperature, contrast, and other parameters. There is not a lot of customization to the drivers. If you want express keys, you could try a gaming tablet, Photoshop Actions, the Tablet Pro app, or a radial menu.

Pros

Affordability
Size
Cables simple to set up (no splitters and such)
Adjustable stand
VESA-compatible (meaning you can attach it to VESA stand, so it can go on a wall or mounting arm)
Excellent pressure curve and pen sensitivity
Good build quality
Comes with useful extras, such as glove and screen protector
no jitter
battery-free pen
uses EMR, a sensitive digitizer system allowing excellent drawing control

Cons

Screen shows some pixelation
Color accuracy is imperfect
Driver installation ease varies
Pen takes a moment to “wake up” if you pause drawing

Ugee 1910B vs. Wacom Cintiq

There are a lot of things that pricey Cintiqs has that this doesn’t, including multitouch–so you can’t use your hands on it, nor finger paint or gestures. The drivers have a lot less customization, and there are also no programmable express keys either on the monitor or on-screen.

You can only get pressure sensitivity in Adobe Illustrator using Wacom tablets, so you will not get it with the Ugee, but you will get it in other Adobe programs. All this is standard for Wacom alternative tablets.

Customer reactions

I’ve looked at Ugee 1910B reviews in different places, and this seems overall to be a pretty well-liked tablet, with praise for the pressure curve. On the negative side, some people have technical issues with the drivers and aren’t happy with the help they’ve received. Occasionally there are issues with the pens ceasing to work, which could be from the battery.

The company seems to issue replacements of the tablet, pens, or parts when needed. In my own contact with Ugee, they responded quickly and helpfully—though my contact was with the general rep, not tech support. They do not seem to have elaborate customer support with screen sharing, but most places don’t. They have a Facebook page where you could upload images or videos if you’re having problems, and they can also be reached via email or Skype (or WeChat if you use that).

The Verdict

The verdict for this Ugee 1910B review is that it’s a very good deal for something this affordable. It works well, with the pressure curve being comparable to or superior to Wacom. It does not have all the features of a Wacom, but it’s similar to other Cintiq alternatives.

The screen resolution being a bit low, and the colors not super accurate, but you can check against your computer monitor.

The Ugee is a fine choice for artists on a budget, for students, or beginners wanting to try a tablet monitor without a big investment. While you may want to eventually invest in a Cintiq, this is a fun and solid drawing tablet with a screen.

Check price and read more Ugee 1910B reviews on Amazon

Link will take you to the local Amazon store for where you’re located.

End of Ugee 1910B review