Author Archives: Vicky

About Vicky

I'm an author and illustrator who has used drawing tablets since the early days. I love how flexible and forgiving they make everything. I'm also fascinated by the technology. I started this site to bring knowledge to everyone. I want this to be the only place you need to go to learn about drawing tablets.

wacomintuosdrawreview2

Intuos Draw review: the simplest Wacom

wacom intuos draw review

Intuos Draw review: best Wacom for beginners & back-to-basics users

The Wacom Intuos Draw is the most basic of the Intuos graphics tablets line and the only Intuos that does not have multitouch capability. That means you can only use the pen on it; you won’t be able to use hand gestures such as pinch or zoom. This Wacom Intuos Draw review is of the Small size, the only size it comes in.

The Draw not as basic as Wacom’s Bamboo signature pads, which don’t have a lot of art features. It’s the simplest of their graphics tablets.

This makes it a good drawing tablet for beginners who might not need multitouch, and want something affordable. If you just prefer or require a straightforward graphics tablet that has Wacom quality without much learning curve, the Intuos Draw might be for you.

Check price

intuosdrawtablet

Features:

Type of tablet: Graphics tablet, Wacom EMR digitizer
1,024 levels of pressure sensitivity
No multitouch
no tilt/angle or rotation sensitivity
Size: 8.25 x 6.7″
Active area:  6.0 x 3.7 in(152 x 95 mm)
Right and left-handed use
Colors: white or mint blue
Size: Small only
Weight: about 10 oz. (290 ±50g)
Resolution: 2540 lpi
Reading Speed (pen): 133pps

What’s in the Box

Intuos Draw (small)
Intuos Pen
Charger
Nibs (3 extra, total 4)
CD with driver and manual
documentation

Inside the outer sleeve is a high-quality, nonflimsy black cardboard box that offers solid protection for shipping.

The art software that’s included has to be downloaded.

wacomintuosdrawreview

Intuos Draw and what it comes with: pen, CD, USB cord, documentation

You can use the CD, which has the driver, if you have a CD drive, or you can download the driver from Wacom. I always prefer to download regardless, in case there has been an update.

Intuos Draw art software: ArtRage Lite examples

artrage doodles intuos

The Draw will work with any art program, including Photoshop and all Adobe software, and gets pressure sensitivity in Adobe Illustrator. It’s fine for Mac and Windows. Wacom includes some free art software with all its tablets, a different program depending on the model. The current offering, which I did these doodles in, is ArtRage Lite.

The Intuos package includes a code to type in to get the free art software and other offers from the Wacom site. In addition to ArtRage Lite, an offer for 30-day subscription to Lynda.com software courses, and an offer for a free photo print on metal. Wacom also offers access to online art tutorials on its own site.

The offers change from time to time, so check when you buy the tablet. Though there are free art programs you can get online, I really enjoy ArtRage, which has a lot of fun brushes and effects, some of which you can see in the above doodles. These include glitter, oil, pastel, palette knife, and roller. It’s a really easy and intuitive program, and is inexpensive to buy the full version from ArtRage (they have a free demo version, too).

These perks are a good incentive to stick with Wacom, especially with their entry-level drawing tablets such as this.

Build and features

intuosdrawnibs

Clever place to store the extra nibs, eh? And the thing on the left is a pen loop.

The back compartment stores the extra nibs. Below the nibs, that little circle is the nib remover where you insert the pen with nib and it pulls it out painlessly. The two compartments around the nibs are for the optional Wi-fi kit parts.

The micro-USB fits snugly and securely into the tablet’s side.

On the upper right corner of the tablet is a small security lock slot for a Kensington lock or pen tether. It’s marked with a small lock icon. The tablet top has a neat little canvas pen loop you can put your pen in. The loop fits snugly and you have to put the pen in starting with the pen’s back end.

The small dots on the surface show the active area, which is mappable, meaning you can use just part of it if you want. Mapping is useful if you want to work without moving your hand a lot. Using just a small part of the tablet, a small movement will go a long way. You set the mapping function in the driver.

Though the Intuos Draw looks almost toylike, it’s not a toy. It’s fairly well built for something so light, though I wouldn’t want to drop it hard, because the outer case doesn’t seem super protective. I found myself gently handling the detachable pieces such as the back cover.

The tablet has lots of good Wacom features, such as getting pressure sensitivity in Adobe Illustrator, and it’s got good old Wacom EMR, the most sensitive type of Wacom digitizer.

If you’ve got a multiple monitor setup, the Intuos Draw might be too small to effectively cover all the pixels needed. Otherwise, it should work on most setups, even with a large monitor.
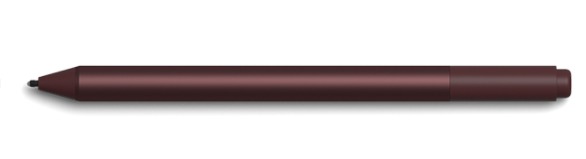
Intuos Pen

The pen has two programmable buttons that you can program for just as many things as you can the Express Keys. It has no eraser tip. It’s batteryless, lightweight, and comfortable to hold. It’s smaller and lighter than the Pro Pen or other Wacom pens meant to be used on the higher-end Intuos Pros and MobileStudio Pro.

I weighed it and it’s only 9 grams, so light it almost feels like a drinking straw. That’s about half the weight of a typical active pen (battery included for those that take batteries) and may be too light for people who like the steady balance of a heavier pen, but I don’t mind it.

Drawing on the tablet

Even though 1,024 levels is low compared to the Intuos Pro and more pricey pen display tablets, the patented Wacom EMR digitizer delivers a smooth drawing experience. The pen is sensitive. It’s thinner and lighter than the Pro Pen that goes with the Intuos Pro. 1,024 is a little bit less sensitive than 2,048, but it’s plenty.

The tablet has a texture that has quite a bit of tooth and is enjoyable to draw on. The nibs wear down a little depending how hard you press. I keep it set to a more sensitive setting so that I don’t have to press that hard). There are extra nibs stored in the top in a small hidden case.

What I really like about this in some ways is its size. I sometimes use it instead of a mouse or the trackpad, as the pen doesn’t put as much strain on the wrists or fingers. It also lets me write notes (to some extent) or sketch. It’s easy to use it for this even when on the couch. It’s light and super-portable.

Small size advantages and disadvantages

If I’m packing for a short trip with my Mac laptop, and want to pack very light, I just throw the Intuos Draw into the outside pocket of the laptop sleeve. The Draw’s charger is small and light, too. I really like that it doesn’t take up much space, and I sometimes even hold it like a clipboard, since it’s so light.

What I also don’t always like is its size.  It feels cramped for drawing larger images, requiring a lot of zooming. If I’m drawing a small image, around the size of the tablet itself, then this doesn’t bother me, but usually I’m drawing larger. The size is good for drawing cartoons, designing characters, or sketching out ideas, and editing photos. I’m not a big OSU player, but it’s fine for that.

Controls

The buttons are in the top corners. They are cool-looking, but it would be more convenient to get to than if they were on the side. It just takes some getting used to. They’re smaller than on the larger tablets. I tend to want to tap them with the pen, and have to remember to use my fingers instead.

Tapping on the buttons brings up an on-screen menu where you set keyboard shortcuts.

intuos draw express keys

Intuos Draw Express Keys open in ArtRage Lite

When you click on the physical keys, the on-screen keys come up. This is the Express Keys just set to their default. It’s open in ArtRage Lite but they would come up in other programs too.

Intuos Draw comes only in Small (not Medium or Large!)

It would be nice if there were an Intuos Draw Medium, but for some reason Wacom has decided to have this one starter tablet, rather than issuing larger sizes that also don’t have touch.

With a small active area, small arm movements make a bigger difference. So you have to control your movements more.

I find a medium-size tablet, such as the Intuos Pro or the economical non-Wacom Huion 610 Pro better for more complex work.

Intuos Draw vs. Art Pen & Touch

The long name for Intuos Draw is the Intuos Draw Creative Pen Tablet. It looks the same as its siblings, the Intuos Art, Photo, and Comics/Manga Creative Pen & Touch Tablet, but these others all  have multitouch, which can be toggled on and off. Each comes bundled with different software. The software can change, but the Art tends to include painting programs such as Corel Painter Essentials. This is harder learn than ArtRage.

User Reactions

This is a popular tablet. People use it for all sorts of things, such as whiteboard presentations.

Intuos Draw Pros and Cons

Pros

affordable
lightweight and portable
fine for right-and-left handed folks
Wacom features and quality
good mouse or trackpad substitute
doesn’t have much footprint on desk
texture has tooth

Cons

can feel cramped
no tilt sensitivity
pen lacks eraser tip
texture of tablet can wear down nibs
pen loop is tight

Tips for getting started

It’s best to keep the tablet right in front of you and right in front of the computer. That way it’s easier to get used to than having it to the side of the computer.

Don’t worry about the Express Keys until you have gotten used to the hand-eye coordination required to use the tablet.

Keep the tablet area mapped to 100% of your screen.

If your monitor is high-res and over 14″, this tablet may be too small. Read our article on choosing the best Intuos to learn more.

Use the pen for everything at first; replace your mouse or trackpad with the pen and tablet.

Wacom Intuos Draw review: the verdict

I’m glad I have an Intuos Draw, as it’s Wacom boiled down to its essence. It’s not my go-to tablet for everything, but if it were my only one I’d make good use of it. I use it quite a bit for smaller projects, I like that it’s so light and unobtrusive, and it’s good for couch use.

Will you miss touch? I don’t miss touch a lot when drawing, as I don’t mind using the art program to zoom and navigate. I miss it when I’m using the Draw as a mouse/trackpad in non-art programs..

Touch can be toggled off on the tablets that have it, so if you decide to get one that does have touch, you’re not forced to use it, as at times you might not want to.

Do you need the wireless kit? It’s convenient and if cords bother you or you’re short on USB ports, it may be worth getting. But it’s certainly not a necessity.

The Intuos Draw review is a thumb’s up.  is a helpful, sporty, affordable, hardworking little tablet that simplifies things. It’s good for students, beginners, photographers, and crafters, as well as more advanced artists.

Learn how to find the best tablets for drawing.

Looking for something larger and economical? See this Huion review.

Read our review of Intuos Art Pen & Touch (Small).

See the Intuos Draw on Amazon

end of Intuos Draw review

newsurfacepro5

New Surface Pro 5 2017 with 4,096-level Pen

newsurfacepro5

New Surface Pro 5 sports pen with 4,096 levels and tilt

new surface pro 5 pen

New Surface Pen for Surface Pro 5, with increased levels, tilt, and a rubber eraser

Microsoft has now readied the new Surface Pro 5, which is actually just called the Surface Pro, for release (so I guess it’s time to party like it’s 2013, when the first Surface Pro came out). The new SP is available for preorder. This updated 2-in-1 tablet/laptop has some very interesting offerings for the art crowd.

The biggest difference is the new Surface Pen, which has 4x more levels of pressure sensitivity, making it 4,192, like the new Lenovo Active Pen 2. It also has tilt including shading. It will have the usual button that opens OneNote and other apps. The pen requires an AAAA battery.

This isn’t the Wacom-Microsoft pen we’ve been hearing about (at least, no one has said there’s any Wacom connection is so far). Microsoft is still going with N-trig.

The new pen also still has a rubberish eraser, and hopefully will still have the nib kit with a variety of nibs with different points and textures in a nib kit, like the current Surface Pen.

If the new pen sounds like the Apple Pencil, it underlines how Microsoft sees the iPad Pro as the rival to this version of the Surface Pro. Indeed, the upgraded pen may tilt the scales for artists frustrated with the iPad Pro’s inability to use desktop programs and inefficient file organization.

I’ll have to try out the new pen before knowing if it’s really as sensitive as Apple Pencil. Up to now, I haven’t been that big a fan of the Surface Pen for drawing, but this new one sounds like a different ballgame.

Surface Dial works on Surface Pro 5

surface dial

Surface Dial

Though the new Surface Pro “5” doesn’t look all that different from the Surface Pro 4, it will also work with the puckish Surface Dial, which brings up an array of on-screen menus aimed at designers.

Now, whether or not the Dial will be of much use on a small screen is hard to say. I’m a believer in the potential of the Dial, but right now it doesn’t seem like a must-have accessory. It makes more sense on the gloriously large Surface Studio.

Surface Pro 4 vs. new Surface Pro 5 2017

The pen is the biggest difference. The old Surface Pen had 1,024 levels and no tilt. This one will have tilt for shading; it’s unclear what else they mean by tilt, since they only mention shading. The Apple Pencil both has angle sensitivity with the tip and shading with the side.

Windows Ink apps include Sketchable, Plumbago, Mental Canvas, Drawboard PDF, and StaffPad. Of course, you can use the pen with any program, including Adobe Creative Cloud.

The pen will have backwards compatibility with all the Surfaces going back to Surface 3, including the Surface Book and Studio. It won’t work on the earlier Surface 2 and original Surface Pro, which were Wacom-penabled. It’s safe to assume it will only deliver previous levels of pressure sensitivity on those.

New Surface hinge makes kickstand more adjustable

Another aspect that’s different and consequential for digital artists is that the attached kickstand will go lower then previous ones. The updated hinge is deeper. The angle is designed to work better for those using the pen. So now the pen use is built into the design.

The new design also has more rounded edges and is “softer,” more Apple-like.

Like its Surface cousins, it comes in configurations of Intel 7th Gen. M3, i5, and i7.

The PixelSense screen of the Surface Pro 2017 is the same size and resolution as the PixelSense SP4–sharp, but not 4K.

The company says the new Surface Pro will get up to 13.5 hours of battery life. That reflects a considerably stronger processor. The processors are now Kaby Lake (7th gen) not Skylake (6th gen). Photoshop rendering and video processing should work faster on this.

The new Surface Pro 5 pen is sold separately, as are the Dial and Type Cover. (The Surface 4 included the Surface Pen.)

The new Surface Pro’s graphics cards will be Intel HD Graphics 615 for the M3, 620 for the i5, and Iris Plus Graphics 640 for the i7. These are next-generation and a bit faster.

The high-res PixelSense screen will be 10-pt. multitouch, 12.3″ diagonal, with a 3:2 aspect ratio, which we like.

The keyboard is upgraded with improved key travel.

Each model will weigh about 1.7 lbs or 766-786g, making it easy to carry around.

Microsoft is talking about how it goes from “laptop” mode to “studio” mode to “tablet” mode.

Apple may be getting nervous about the new Surface Pro 5. On the other hand, perhaps the competition will spur Apple to make a real laptop or even a monitor with an active digitizer.

Microsoft does plan to make a Surface Pro with LTE.

You can see or order the new Surface Pro (5) at Microsoft. Or see/order it on Amazon

See our article on the 10 top tablet PCs for art.

Read our homepage article to learn all about drawing tablets.

lenovo-active-pen-2

Lenovo Active Pen 2: the mystery deepens

novo-active-pen-2

Lenovo Active Pen 2, where art thou?

UPDATE: The Active Pen 2 is now for sale.

Many of us have been waiting anxiously for the Lenovo Active Pen 2 with 4,096 levels of pressure sensitivity to hit the shelves. Shown first at CES along with the Miix 720, the pen was scheduled for Feb. 2017. To this day it remains unseen on U.S. shores. But is it hiding in plain sight?

lenovo-active-pen

Lenovo Active Pen “new release”

At a brick and mortar store, I asked about the Active Pen 2, and their system only had the Active Pen, the old one (version 1), same part number.

Lenovo Active Pen “new release”

(photo coming, WordPress uploading not working at the moment!)

But it was marked “new release,” in the store’s online catalogue. This store, which I trust, says that means the item has come out within the past month.  Lenovo’s online info about THIS pen now states that it will get 4096 levels on some systems. I purchased the pen with the intention of using it on the Miix 720, but I doubt I will be able to discern the difference between 2048 and 4096 levels.

It’s a Wacom Active ES pen that takes AAAA batteries. It’s for the Miix 510, 520, 700, 720,, and Yoga 900s, but many report it works on the 2nd-gen Lenovo Yoga ThinkPad 14.

(I will have to try it on other AES systems too. They’re not always cross-compatible, even if they seem like they should be. Lenovo is only mentioning the Miixes and 900s as working with this pen, not their myriad other AES tablet PCs.)

The Lenovo Active Pen 2 is mentioned on non-US sites as shipping with the Miix 720, but the Active Pen 2 is not currently mentioned at all on the US site, which says Active Pen 1 on the Miix 720 page.

When I asked Lenovo reps, I was told that they have no idea about any of this, and they’ll get back to me. (It’s not their fault at all–Lenovo is rarely forthcoming with such info).

They did assure me that the Active Pen 2 would not have the same part number as the Active Pen 1, but they did not assure me that the entity known as Lenovo Active Pen 2 would ever be available in the US at all. They also expressed surprise at the “new release” info and asked me what store this was at (it was B&H Photo).

There are some internal Wacom photos of the Active Pen 2 here. It looks pretty much the same as the 1, though the clip may be slightly different, but that doesn’t mean much. The barrel may be a little shorter too (hard to say) but this could be a prototype.

I don’t see definite differences in the photos on the non-US Web sites, as the pen pics are not that close up.

Perhaps there will be two pens in the US, but they will look different but do the same thing, getting the full 4096 levels. Or perhaps those other countries are getting something different-looking or different in some other way, but the one in the US will be like this new release one and do what the 2 does. That would be fine. As with people, its what’s inside that counts.

What’s annoying is the announcement about a Pen 2, then not having any info about it.

Another possibility is that there is wrong info on the Lenovo site or that the “new release” info on the B&H site is wrong and this pen does not really get 4096. It is very difficult to confirm just by testing, as added levels, especially just one jump, are somewhat of a placebo effect.

If the new release Active Pen 1 gets the 4,096 levels on the tablets capable of doing that, it would indicate the pen has had an update. The box says 2048 levels, so it’s backward-compatible that way. Either way, either pen will work on the Miix series and the Yoga 900s.

It certainly is a mystery, but one likely to be resolved in coming weeks. Watch this space.

Got a capacitive (non-pressure sensitive) tablet? Read our post on finding an iPad or Android stylus for drawing.

ilapis on pencil

Interview with Giulio de Vita, creator of iLapis: turns pencil into stylus

iLapis creator Giulio de Vita on the vision behind this game-changing device

Giulio_De_Vita

Giulio De Vita, comics artist and creator of iLapis

The iLapis is a sleeve that you put on a regular graphite pencil to turn it into a capacitive stylus. It has attracted attention from sites from Tom’s Hardware to ProCreate to LaStampa TV.  Amazingly, it’s only going to cost a couple of bucks!

Not only that, but lets you use the side to shade and it gets pressure sensitivity via apps sensing its speed. It can be used on any tablet or smartphone screen. I spoke with the creator, well-known Italian comics artist Giulio De Vita, over email, about his vision for this unique and game-changing dream art tool.

Tell me a little about yourself. Who are you, where do you live? Are you an artist?
I’m a comic book artist. I’m quite well known in Europe. I worked for mayor publishers since I was 16 years old. But I love to go further comics, I use to work in advertising, cinema, animation, videoclips, theatre.

A real artist never says that it is an artist 😀

Do you usually use a tablet to draw and paint?
I’m a curious guy, and I love to search, try, experiment tools, techniques, artistic languages, media to express my ideas. When digital devices came out, like all creatives, I have been fascinated by these new supports… At the moment I think that they are still too limited to replace traditional artistic tools for fine art, but I’m sure they are a very good tool for standard level. I do not use a tablet for a final art, but I use it for fun, or to make sketches or studies. Paper is still present in my life and I use digital device and paper at the same time.

What inspired you to create the iLapis?
As I use paper and digital device at the same time, I need a unique took to work on both support without changing continuously… As a drawer I tried to sketch on tablet using traditional styluses: they were not precise at all, so I spent lots of money for active capacitive styluses (Adonit, Bamboo, and later Apple Pencil). They were too heavy, fragile, and most of all expensive…

I thought about Steve Jobs when he said that touchscreen are born for the use in mobility that’s why he never wanted to produce a stylus for these device: you can loose it, break it etc…

An expensive stylus is too dangerous to be used in a train, on a beach or at school or in a construction site… For these use you need something resistant, light, that you don’t need to recharge, that is inexpensive, and that if you loose, forgot at home, someone stole it, you can buy another anywhere: in any stationery shop or at a supermarket… even in a lost island in Greece or in small village in Iceland.  Like a pencil, but a real pencil.So I started studying if there was a way to let a normal pencil work on digital devices, and, EUREKA! I found it!

ilapis.interview

iLapis in action

What do you hope to bring to the world with the iLapis?
First, it’s a romantic value, quite philosophic: the idea that an object that most people consider passed, like a pencil, can still say a lot. This can teach us that we shouldn’t give all for granted, because in the specific of iLapis a simple, inexpensive pencil is more innovative and performative than a hyper technologic and hyper expensive stylus.

Second is very important I think not only for artists, but most of all for children, who are more and more focused on digital devices. They can use to  keep the confidence of manual use, of the correct way to do traditional handwriting. Think about how important can be this product for playful teaching of writing.

Third thing, is for the pocket of the millions of people using smartphones and tablets in the world. iLapis is not only an excellent writing and drawing tool, but also a very good way to tap and swipe for people who have problems with their fingers (trembling or size, or simply the need to use gloves that make the finger touch impossible) or view.

What kind of challenges did you face in creating it?
The jungle of the patents’ bureaucratic procedures.

Is it difficult to get an item like this onto the market?
I think it’s difficult, because it’s new in some way, because it changes the perception of the capacitive stylus not more like a digital tool, but like a simple stationery tool. People thinks it’s a chinoiserie or a trick for its simplicity and low cost.

Is the iLapis your first product creation?
Yes, I used to customize artistic tools for my needs, but of course they were too specific to justify a production. I remember that some years ago I had fun to make a publishing project about impossible funny inventions (like the pillow that combs you while you sleep :-D) where maybe the idea of becoming an inventor has grown in my mind.

How does it work?
It’s really simple: it’s a transparent conductive film that you apply, through a grip, on the tip of the pencil to enlarge the surface of contact of the pencil to the touchscreen. The device detects this contact, like it was a finger, as the graphite of the pencil is a very good conductor like the human body.

You said you can use it with Apple Pencil. What happens?
That’s what I discovered recently: Apple Pencil works exclusively on iPad Pro, But if you apply iLapis on it you transform it in a universal capacitive stylus, so you can use it on any brand of touchscreen, size and model.

Does the iLapis work differently on iPad and iPad Pro? Does it get pressure sensitivity on iPad Pro?
iLapis has no battery, has no electronics parts, has no wifi or bluetooth connection: that’s what makes it different! (it’s nice to think that I “thought different” from Apple :-)) iLapis is the most precise capacitive passive stylus and the finest tip between all capacitive styluses (even actives), the one working at higher inclinations, the only one working on paper and touchscreen with the same tip

iLapis works the same way on any brand and model or touchscreen. It has no pressure-sensitive system, but drawing apps detect the speed of the gesture and interpret it as pressure with excellent result: I think that’s enough for a 5€ product instead of 100€ 😉

Tell me about your partnership with Perpetua.
Perpetua is the only pencil 100% made Italy (it’s incredible for the country of Leonardo, Michaelangelo, Caravaggio and Giotto)  with recycled graphite, ecological because made without wood, that draws underwater, that does not break when it falls, and that has been chosen for its values by G7 presidency as official gift for international delegations for the 2017 G7 summit that will be placed in Italy in May.

When I started the Kickstarter campaign I was contacted by Susanna Martucci, the brilliant inventor and entrepreneur of Perpetua, who saw many things in common of our stories and our products, and told me that we have to be partner. I’m very pleased of that, and I think we’ll make a long way together.

Does the iLapis work only with a pencil, not other drawing tools?
It works on any tool made in a material that is conductive.

Can you put it on a finger and use it? How about a stick?
Yes but I can’t see the utility of this, as iLapis is designed to use a fine tip on a touchscreen, and not a large finger 😀

Is it something like Lenovo AnyPen that works with a banana but not with things made fully of plastic?
I think that Lenovo AnyPen has an hardware and operative system that let the touchscreen to detect smaller contact surface than other touchscreen. It gives a different solution to the same need of iLapis: to use any pencil on a touchscreen. iLapis is the solution for any other touchscreen.

Does the line get the texture of a pencil?
It depends on the app you use: you use a pencil, but the device read it as a normal stylus: through the app you can obviously chose any tool (pencil, pen, brush, eraser …) and colors (white, green, red, blue etc…) sharpness , opacity, dimension…

If you use a colored pencil, would you get a black line or a color line?
A colored pencil doesn’t work on iLapis, because inside the colored pencil there is no graphite but pigments that are not conductive.

Does it matter how sharp the point is?
No.

Can you use it with a mechanical pencil, made of metal or plastic?
Yes, you need to have enough graphite inside the mine: if the mine is too thin (0,3mm; 0,5mm; 0,7mm; 0,9mm; 1,4mm) there is not enough capacitance to be detected by the device, if you have a large mine mechanical pencil it works good.

What drawing apps do you prefer to use with it?
My favorite are Procreate, Pen & Ink, Pencil,  Sketches, Penultimate and Notesplus.

What tablets does it work on? Does it work on Android tablets? What about phones? Touchscreens on laptops?
It works on any capacitive touch screens, of course it depends of the quality of the touchscreen and their apps. It works on trackpads too even if it make no sense to use it this way 😀

What will it cost?
The final price should be between 2,5 to 5 dollars, but it depends of conditions of distributions. anyway drastically cheaper than any other stylus.

Where and when can I buy one?
The Kickstarter campaign has just finished and unfortunately it has not be funded. Apparently it’s not a good sign, but I’m very happy about the result of the campaign. First of all I put a high goal of 33000€, that’s because I have to patent worldwide the idea and to set a mass production, and find a distributor.

That’s what I can’t do alone, and I need to find a partner to do that, I’ve never been intentioned to make handcrafted products. I want to do it seriously, because I believe in the product. Of course the mass of people out there doesn’t care a lot about the project, and care about the product.

The result of 7400€ is very good, and what’s more important for me is the big interest of the press about iLapis, and the enthusiasm of  people talking about it on the web… thats a really important approval rating for a product.

Now my concept is real and can be developed in a product. I hope very soon, with some improvements that I had in mind since the launch of the campaign.

What are your next steps, do you have more ideas for new creations or for the iLapis?
Next steps are to design a product that can be produced compatibly with Perpetua’s values (recycled material and 100% made in Italy) and then find a good distributor.
Thanks very much and congratulations on the iLapis!
Thank you for your interest.

Check out Giulio’s Web site here

7 free online image editors

7 great free online photo editors

7 top free online image editors and collage makers

7 free online image editors

Browsers can handle much more heavy-duty image editing than before. If you’re looking for a photo editor online that’s like Photoshop, you won’t find something quite as powerful. But you’ll be able to get many of the same photo effects online that Photoshop offers.

These Web-based programs can be invaluable tools to quickly create graphics for social media or even for print. You can make a photo collage totally online, either one in neat boundaries or loose ones where you can arrange collage-style images however you wish.

One of the most basic functions is as an online image resizer. Online photo editors let you resize images to any dimensions, and low, medium, or high resolution. Some offer extra high retina resolution.

Another is an online collage maker. You can arrange images in cells, with borders automatically resizing.

They let you save images as jpgs. For more on what a jpg is, see Vector vs. raster for noobs.

What can you do with an online photo editor?

Web-based image/photo editors let you upload your own image or choose from included libraries of royalty-free images. Often, you can share directly to social media accounts.

Most online image editors operate on the Freemium model. So while a lot of it is free, if you want more features, there’s a monthly or annual charge. Some offer a free trial.

Most have filters, text and image overlays, icons, templates, backgrounds, and even layer support. They provide a library of fonts as well as giving the option of letting you use ones installed on your own computer. They allow text enhancements such as outlines, and the addition of vector shapes you can use in designing. You can make cool double-exposure photos, blur backgrounds, and even apply “makeup.”

Here are 7 of my favorites:

1. PicMonkey

A popular free image editor, PicMonkey is highly versatile, with plenty of free options. PicMonkey lets you edit, upload, design, and collage. It also lets you draw freehand.

free online photo editor

PicMonkey

PicMonkey has a healthy selection of fonts you can use to overlay or caption your images. Its touch-up tools to make faces look better. (Many of these touch-up tools are in the paid version). 

It offers well-designed templates for when you don’t want to start from scratch. It’s very simple to use for basic stuff, but also has more advanced things you can do with brushes and filters. For those, it’s best to watch the video tutorials. You can choose high, low, or medium-resolution files to save.

You do not have to log in to use PicMonkey.

You can share directly to social media, such as to your Pinterest boards. PicMonkey does not resize images automatically, and it doesn’t have many premade social media image sizes. 

To upload your own image and resize it, choose Overlay.

PicMonkey occasionally runs slowly or glitches for me, and there are a few common tools I wish were free. But I use it a lot—it’s quick, easy, and convenient. It has a “fun” feeling, with humorous messages and a monkey mascot. 

2. Canva

Canva is also very well-known. It has thousands of premade templates, many already made to standard social media sizes, such as Pinterest. It has thousands of templates to choose from, from simple to complex, or you can start with a blank one. 

canva graphic design tool

Canva is robust, and can be used for professional graphic design. It has an accompanying iPad app. It includes photo effects such as stickers, blurs, badges, charts, presentations, infographics, and book covers. It pretty much has everything.

Canva can indeed be a powerful tool. One problem I have problems with it running so slowly in my browser (I usually use Chrome) that I could not use it, but when it works it works well. Canva is a serious business tool. 

3. Fotojet

Fotojet is a hidden gem. You don’t hear about it that much, but it’s quite powerful, and similar to PicMonkey. The paid version is lower cost than others (at the moment). 

Fotojet

Fotojet

Fotojet has premade image sizes if you like creating the image from scratch instead of using a template. Templates can have a lot of fussy little pieces you need to delete, and you spend more time altering a template than you would designing your own piece. But depending on what you want to do, templates can be a valuable tool.

The templates are well-designed and on the traditional side. The creative collage options are cool, with fun effects such as 3D. There are also templates for photo cards and other occasions. There’s a lot to play around with. Fotojet lets you share images directly to social media; remember to put your own link in.

The program is snappy; I’ve never had it run slowly. Like Canva and PicMonkey, it supplies editing effects, fonts, embellishments, templates, and file-saving options. It has quite a few text effects. It’s powerful in image editing, offering advanced filters such as Color Splash and Radial and Tilt Shift for sophisticated photo effects. While it’s not enormous like Canva, there’s a lot it can do.

4. Stencil

Stencil stands out for a few reasons. In addition to the desktop app, it offers a Chrome browser extension that lets you choose an image directly from the browser, open it, and then add text and other embellishments. (You don’t have much control over the size, but they’re supposed to be redoing this feature soon). Or, you can upload an image as an icon (overlay) and control the size. You can then add text to it. 

Stencil’s big draw is that you can automatically resize images to fit various social media demands at the click of a button. Then you can share them directly to your accounts. So it’s a huge timesaver if you do a lot of sharing. 

You get 10 free images per month. 

Stencil is a business social tool.If you’re serious about making beautiful images across channels quickly, it may be worth it to invest in Stencil.   There are two paid levels; it can get kind of pricey.

5. Snappa

Snappa has a ton of premade social media sizes from the obvious to the unexpected, including YouTube Channel Art, Email Header, Twitter Card, and LinkedIn, as well as “eBook Cover” and “Infographic.”

snappa free image editor

Snappa can automatically resize graphics you’ve made to fit various social media demands.(I do like to make pins, but not to have to keep typing in the numbers 735 x 1102). It lets you upload and save images for later use even in the free version. You have to log in to use Snappa. You can schedule your creations on Buffer directly from it. https://snappa.com?afmc=9s 

Like Stencil, Snappa is not that cheap, but can save you a ton of social-media time.

6. BeFunky

is a photo editor, collage maker, and design tool. It has lots of facial touch-up tools in the free version (unlike PicMonkey). So if you want to retroactively do a makeover, this is the image editor to use. It’s also got templates.

befunky-online-photo-effects

BeFunky partners with Pixabay, a free stock-image site. Its graphic design tools target cards, invitations, even menus. It has lots of social media headers and when signed in, you can save directly to social media. You don’t have to be signed in just to use it. It has a variety of blog headers and graphics sizes.

BeFunky has an arty feel and fun designs and image effects. It’s great for bloggers and designers. Like Fotojet, the monthly fee is low and gets rid of ads. 

For bloggers who want to jazz up their sites, BeFunky may be the best one out there. Its paid features filters like “cartoonization” and “graphic novel.” You won’t get bored using BeFunky.

7. Fotor

Fotor collage maker is one of the free photo editors online.

Fotor collage maker

It lets you make collages on a grid with your choice or how many cells, borders, and stickers. It lets you choose funky borders for the collages, such as heart-shaped cells with which you can create photo mosaics.

Styles are plentiful: Artistic Collage, Classic Collage, Funky Collage, and Photo Stitching. Fotor has advanced features and photo effects similar to Photoshop, such as Curves to adjust lights to darks, and tilt-shift to blur backgrounds.

Its special features are HDR, which lets you combine three photos of different exposures into one optimal one, as well as some really cool art filters that let you get funky effects. It also has digital enhancement effects such as “weight loss” and “makeup” in the free version. Fotor is a powerful online collage, design, and editing tool.

It also has some free clip art and presized social media images. Fotor has a free and paid version. The paid is a lot cheaper if you get it for a year.

Online photo effects vs. Photoshop

Some of the editors lack useful features like the eyedropper tool, and you can’t open PSD files; I am not sure what the limitations on layers are–but they do provide quite a few features of Photoshop. I like that you can draw freehand in PicMonkey–that isn’t a feature in all of them. They have the “enhancement” parts of Photoshop but not the extensive text tools, brush sets, ability to work with Smart Objects, different file options, and such. 

These editors are great for online uses such as memes and social media. But since they allow for high-resolution files, you can also use them to spruce up your photos and artwork for print. They certainly can’t come anywhere near the feature set of Photoshop or InDesign. 

Web-based photo editors: in sum

Each image editor has its own focus, so to speak, with PicMonkey more for social media with an emphasis on fun and upbeat (the monkey shows up with cute sayings). Canva is all about variety and endless customization, it has a more structured feel.

Fotojet is a bit of everything—it’s not as large as Canva, but does some things PicMonkey doesn’t. Snappa is efficient and businesslike. BeFunky is creative fun that’s more similar to PicMonkey but larger. Fotor is about creativity and spending some time making something special (or you can work quickly, too).

In writing this, I’ve realized how incredibly complex these online image editors are. I no longer automatically fire up Photoshop if I need to make a graphic. I remember some of these from when they started out, and it’s amazing how far they’ve come.

You can truly use them as free graphic design tools to make things like ebook covers and presentations that you once needed desktop software to do. That’s not to say that designers no longer need desktop software, or that the skill is no longer needed. 

 Just about anyone can make beautiful designs with these tools, and designers can make eye-catching, original creations—all for free, or a low monthly fee. Try them all!