Category Archives: Articles

Informational articles on various topics related to art tablets and digital art, tech news, and more.

pnboo 2150 review

PNBoo PN2150 review: affordable graphics monitor

pnboo pn2150 review

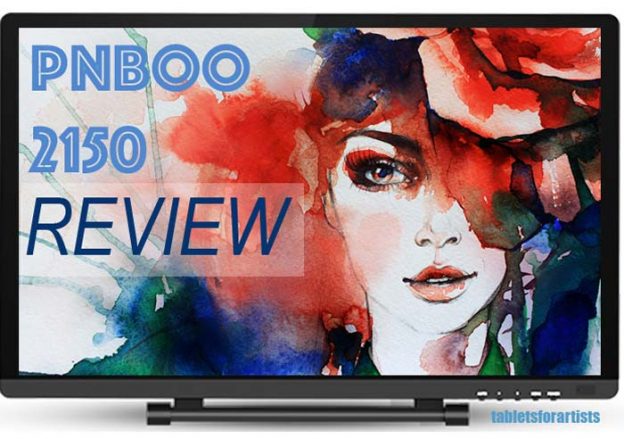
PNboo PN2150 review: budget tablet monitor

Here’s a full PNboo PN2150 review and art program tests.

Pnboo graphics monitors are made by China’s Shenzhen Pnboo technology company. Their products are sold in over 100 countries.

This 21.5″ tablet monitor is a new offering, in the vein of Huion and Ugee tablet monitors known as Wacom Cintiq alternatives. These attach to a computer and provide a second monitor with a touchscreen and pressure sensitivity. PNBoo also sells a 15.6″ version they call the PNBoo 1560.

Here’s a video showing the pressure sensitivity in Photoshop. A pen test showing the tablet from the outside is below.

https://youtu.be/_fz4K5TjFwk

Type of tablet

Tablet monitor
Needs to be attached to computer

Type of digitizer

EMR (Electromagnetic Resonance)

Features

21.5″ diagonal screen
HD display
2048 levels of pressure sensitivity
batteryless pen (charges with cord)

Comes with: 2 pens, 2 pen power cables, screen protector, drawing glove, extra pen nibs. Cables: HDMI, VGA, USB, power cord, English user manual, CD drive. Drivers also available for download on the PNBoo site.

Drivers available for Mac and Windows.

Packaging

The Pnboo graphics monitor arrived safely nested in styrofoam blocks inside two inner boxes, one of which has a plastic handle, and one outer Amazon box. As with some other budget tablet monitors, the box containing the tablet was plain cardboard without any printing.

The PNboo comes with lots of accessories such as a glove, two pens, and screen protector. It also has numerous cables: USB, HDMI, VGA, and two pen charging cables.

It does not come with a Mac adapter, so you’ll need to have a mini display port or USB-C to VGA or HDMI adapter for your Mac.

Display

The HD screen is nice, clean and shiny, with no dead pixels. The black border is reflective. It’s about an inch wide on the top and bottom and a little thinner on the sides. The plastic screen isn’t too glossy. It doesn’t have a texture the way Cintiqs do.

The screen has a black border with no bezel, so you can run your pen right off of it, making it easier to draw right out to the edge.

pnboo pn2150 review

Build quality

The body has a pleasing design with a curved back. The back has a textured plastic that’s grippable. The plastic is not that thick, but the thing seems sturdy. I would not want to drop it. The back has a rounded design

There are air vents in the back, as well as speaker holes, which a lot of these types of tablets seem to have.

pnboo 2150 tablet monitor back

Adjustable stand

The metal stand is solid and adjusts easily. You pull up a lever and pull on the stand to lower it.

The ports for the cables are under a panel in the stand, which to me isn’t optimal. It’s harder to access them that way, and it makes it easier for them to get jiggled loose. The ports seem fine, not loose.

With the stand extended. the footprint of the stand and tablet from front to back is about a foot. The stand goes all the way back to about a 25-30 degree angle.

The stand has a rubber cover on each side of the bottom bars to keep it from slipping around or scratching your table.


PNboo stylus pen

The pen requires charging from a USB port. The cord is long enough that you can charge it and draw at the same time. The pen is lightweight, since it has no battery. It’s pretty thick but comfortable to draw with.  It’s the standard pen used with Huion, Ugee, and most other Chinese tablets. The pen has a blue LED indicator light that stays on while it’s charging. I charged it overnight, as there’s not a clear way to show if it’s fully charged.

Drawing on the PNBOO 2150

Here’s a quick pen test. This is using a thin pen.

https://youtu.be/P0pWPri5j9k


First off, there was that familiar squeak when I used the pen. I’ve begun the process of rubbing my hands on the screen to impart some oils from my hands to quiet it down.

Though it comes with a screen protector; I don’t use one unless a screen is too slippery, and I don’t find this one to be. I like the way the plastic pen tip feels on the bare screen. So for now, I’m living with the squeak. It’s that new tablet-monitor sound.

Software

Installing the driver was quick and easy. Even though I’d forgotten to remove a Wacom driver, the PNBOO 2150 driver installed and worked anyway. (I do recommend not forgetting to remove other tablet drivers you’ve added!)

As with most affordable graphics monitors, the driver functions are very limited compared to Wacom drivers. You can test and adjust the pressure curve from heavy to light. You can program the pen button to click toggle to eraser.

You can calibrate the screen and draw lines in different colors to test the pressure. But that’s all. You can’t program your favorite shortcuts into Photoshop and other programs.

Drawing on the PNBOO 2150

pnboostyluspen

The PN2150 comes with two of these stylus pens.

The screen came calibrated, but it could have been better. I recalibrated and it was more accurate afterward. On Mac, there was a 5-point calibration. The accuracy now is fine. Because of the glass, there’s a little parallax, but now there’s no offset.

I first tried Photoshop. The pressure curve is smooth and controllable. Some of the low-cost tablets have almost too springy a line but this one is very natural-feeling.

You have to apply a bit of pressure to draw. It’s not quite as sensitive as Wacom, where the inital activation force is really low, and even lightly dragging the pen without all the pen’s weight can leave a mark. On the PNboo, dragging the pen across it using the pen’s weight resulted in a very light line.

I have the settings on the lowest, requiring the least amount of pressure. I don’t like to press down much; it’s an individual preference. The Pnboo feels comfortable to draw on for me.

Art programs tested

So far I have only tested on a Mac. I plan to add Windows testing soon.

Besides Photoshop, the pen pressure and drawing works great in Gimp, Sketchbook Pro, Clip Studio Paint/Manga Studio, Inkscape, and Illustrator. Some of the cheap tablet monitors I’ve tried have had drivers that haven’t played well with Photoshop and Gimp right away, but this one seems perfectly attuned to the pressure settings in those programs. (I am working with clean installs of the programs, and hadn’t tweaked anything.)

This not being a Wacom driver, there’s no pressure sensitivity in Illustrator (Illustrator limits the pressure sensitivity to a couple of types of brushes). If you want to get pressure in vector, you can use Clip Studio Paint’s vector layers, but you can’t export the file type into other vector programs.

I experienced no lag or latency with any programs. The driver really works well.

You can draw with the pen plugged in, but let it charge for a while first.

Color

The display color is a bit warm out of the box. I fiddled with the menu on the display, which lets you adjust color temperature, brightness, contrast, and red/green/blue. This took a while, but I got it to a nice neutral white.

Pros

Nice design
Driver easy to install (in my experience)
Smooth, consistent drawing across programs
Comes with extra pen and other accessories

Cons

Features are basic: no programmable buttons
Cables on bottom of panel
Doesn’t come with adapter for Mac
Needed to fiddle with calibration and color settings

User reactions

So far this PNboo 2150 review seems to be one of only a few out there, but I’m sure that will change.

PNBoo 2150 vs. Wacom Cintiq

The PNboo 2150 has the same screen size as the Wacom Cintiq 21. It has the same HD (1920×1080) resolution and the same amount of pressure sensitivity as traditional Cintiqs (2048 levels. Newer Wacoms such as the Cintiq Pro and Wacom Studio Pro have more). 2048 is more than enough in real-world use.

The tablet has no programmable shortcut keys. It does not get tilt/angle sensitivity.
With the current stand, you can’t swivel it like you can with a Cintiq stand.

But, this costs a heck of a lot less.

PNboo PN2150 review: The Verdict

Though it required some adjusting of the settings, I found it took less adjusting in the art software I tried. I’m using fresh installs of these particular programs, so it’s not because I saved settings from before. Everyone’s system is going to have different things on it that could affect things but in this case it went well.

The tablet overall is pretty similar to the XP Pen, Ugee, and Huion ones that have no programmable keys.

So far the driver stands out for working well across programs, while the rest of the package is basic. It can do most of what a Cintiq can do. This tablet is a great starter tablet monitor, or one to keep.

The conclusion of this PNBoo PN2150 review is that it’s a solid addition to the budget graphics monitor lineup. It doesn’t have bells and whistles, but if you want to draw on the screen it works well. Recommended for students and artists on a budget or just those who don’t need the advanced features of a Cintiq.

See the PNboo PN2150 on Amazon

See/Buy on Amazon UK

Pnboo site: pnbootech.com

See more budget tablet monitors

Read intro post about top drawing tablets

End of PNBOO PN2150 review


google tilt brush

Google Tilt Brush app review: paint in virtual reality

Google Tilt Brush: sculpting in thin air

Google’s tilt brush app is a fun, free app you can use with Vive and Oculus Rift headsets. I gave it a whirl to try to compare it to the experience of drawing on a tablet.

tiltbrushappart

“Art” in the cosmos. (credit: Tablets for Artists)

The first thing is that the software is simple, comparable to a mobile app. It takes 15 minutes or so to learn your way around the app. The biggest challenge is sensory overload. It feels absolutely real. I suggest not doing things too quickly. I didn’t make much attempt to make a finished work of art, and am still a beginner. I can see that it has a lot of potential, and would take a lot of practice to get better control over it.

Drawing is a bit challenging because your sight line and angle easily changes. For instance, this virtual snowman’s carrot nose looked a lot better in the headset. And the 3D effects aren’t coming through with this brush. Even approaching the snowman was tricky; I learned I had to walk right up to it rather than trying to reach it.

Another issue is that in a hot room, the headset can end up sliding down your face due to moisture, which can make it harder to see the controls, and affect visibility of the whole thing. It works best in a cool, dry room.

tiltbrushsnowman

Alas, there’s no “corncob pipe” brush. (credit: Tablets for Artists)

Tilt Brush app lets you paint in virtual reality that you’re right in the middle of. The room is your canvas. Just put on your virtual reality glasses and fire it up. Anyone can use it immediately; it’s intuitive.

You hold a controller in each hand; I found myself switching brushes a lot with one and taking a lot of snapshots, videos, and gifs with the others. The virtual controller has brushes with strokes of fire, snowflakes, and stars. There’s a full color wheel and picker. You can have a lot of fun with the effects. One of the coolest ones is smoke, which produces a foggy atmosphere (reminded me more of fog than smoke).

Inside Tilt Brush, you’re in charge of the sky and the backdrop of your world. You can pick different environments, moving from skies to mountains. For gaming veterans, the interiors of Tilt Brush may feel like a step backward, as there’s nothing that fancy, no characters or elaborate worlds. But you’re the creator here.

You can import 3D objects and draw on them. This was a bit tricky due to the angles. There are even audio-reactive brushes that bounce along to tunes. You can paint along with others as a group. VR parlors provide equipment for kids to Tilt Brush at parties.

Google has enlisted artists-in-residence at the Google Cultural Institute in Paris to share their creations. They work in a range of media, from animation to murals to computer art, and bring these sensibilities to their Tilt Brush work. They created pieces including disembodied organic, geometric tangles; humorous game-inspired animation; a “junk robot” aesthetic; and, from a hip-hop artist, dancing light beams.

One of the importable objects is dress form. Why a dress form? One possible use of the app for clothing designers to quickly make 3D mockups using realistic fabrics and textures.

Tilt Brush brings the potential of digital art to a new level–that of sculpture. It can also be just fun way to doodle or play with friends. The app has recently gotten an update.

It’s definitely worth a try if you’ve got access to a headset or VR parlor near you.


See user-uploaded Tilt Brush sketches.

The Tilt Brush app itself costs about $20.00. it’s bundled with the HTC Vive. Share your Vive art in the Steam Community. You can also use it on Oculus Rift. Follow #tiltbrush on Twitter.


See article on the Mobile Digital Creativity Summi

ipad pro screen protector

Should I use a screen protector to draw on iPad Pro?

Should artists use a screen protector with the Apple Pencil?

screen protector to draw on ipad pro

Now that I’ve had my iPad Pro for a while, I’ve finally gone beyond random scribbles and dived into some apps and drawings. I now find it to be my main tablet, since I’m addicted to its portability and wide choice of apps. But, slipperiness is an issue; sometimes I feel like the Apple Pencil is skating on a tiny ice rink. Finally I got around to trying a screen protector to draw on the iPad Pro.

(Read what’s new for artists in the 2017 iPad Pro)

Slip slidin’ away on the unknown glass

Unlike Wacom, Apple does not coat its glass with a substance that gives it a paperlike bite. The benefit of not having this coating is that that the display’s colors are bright and clear. But your hand can slip around.

Nobody but Apple knows what glass is used in the iPad Pro. The Surface Pro and many other tablets, including, reportedly, the first two iPads, used Gorilla Glass, but Apple keeps the iPad Pro glass a secret.

The iPad Pro screen does come with both a fingerprint-resistant oleophobic coating, and an antiglare coating. All the same, it gets smudged easily, and I can see my face in the screen when the tablet is turned off, so glare is there. Without these coatings, the glass might be even slicker.

The Apple Pencil is relatively heavy, and the length of it took some getting used to as far as finding my balance, making the slipperiness even worse. Its tip is hard rubber, not plastic, but the rubber is so hard that it’s plasticlike. I had put a matte screen protector on XP-Pen and Ugee tablet monitors and liked the feel, so I decided to try one with the iPad.

My choice: matte screen protector

I got the Photodon matte MHX 25% anti-glare high-definition for the 12.9″ iPad Pro, ordered from Photodon. Photodon makes high-quality screen protectors. They’re a little pricey (this one is over $20 for one), but you can get a wide variety of surfaces for just about every screen you can think of. If they don’t carry the size you want, they can custom-cut one. You can also order sample packs to try out different types. I didn’t consider a glossy one because a matte surface gives the tooth I want.

The Photodon protector perfectly covered the whole screen and the border as well, with cutouts for the home button and camera that fit fine.

The screen protector came with a cloth, a moist wipe, and a sample piece to test. I followed the instructions as well as I could, except the optional one to use a vacuum to get every speck of dust. I don’t have a vacuum like that. Luckily, the vacuum was only a suggestion. I also turned off the screen so it would be cool, as the instructions said.

Bubble trouble?

Bubbles in a screen protector are a pain. They are visible and distort the image. Oddly, drawing over them doesn’t seem to affect the drawing much unless the Apple Pencil gets caught on one. There are ways to get rid of bubbles but it’s not easy.

One solution for bubbles I’ve heard about but haven’t tried is to put on the screen protector in a steamy bathroom, but it’s over 100 degrees outside today, so I didn’t feel like creating a steam room.

Does a matte surface wear down the Apple Pencil tip?

If you press very hard, and draw all day, you might wear down the tip a bit. But your lines and painting are coming from software, not the sharpness of the tip.The tips are not that expensive to replace; you can buy a 4-pack of them.

I have only just installed the screen protector so it’s too early to say, but I doubt it’s going to be a problem.

You just don’t want to wear it down to where it’s whittled to a sharp point and tears your screen protector or scratches your screen. It’s an unlikely scenario.

Keeps Apple Pencil from scratching the iPad Pro screen

Another benefit is that it’s possible to scratch your screen with the iPad Pencil if a little speck of sand or dust lodges itself in the rubber tip. A screen protector provides protection against such a mishap.

Multitouch and handwriting

Touch works fine with the protector on. If anything, the screen protector will save your screen from smudges from your hands. It also improves handwriting.

Drawbacks to screen protectors

Screen protectors can be hard to put on; they also add some expense. Bubbles can be hard to get rid of.nti-glare coatings can reduce clarity. The film may block or even refract light, causing a slight blurriness or the appearance of colors via the refracted light. I don’t find it to be an issue in this case.

The verdict: I am pro-screen protector

I find it better to draw on the iPad Pro with a screen protector than not. I was able to draw my straightish lines a lot easier than before, when the Pencil tip would slip. It makes me draw a little slower, with more control. That ends up making me work faster, as I’m not fighting the slickness or spending much time on cleanup.

I stopped getting tons of little “hooks” on my lines that were caused by slipping. Erasing those hooks was a time-consuming task. They would show up right in the beginning and sometimes also at the end of the line, like a tail.

They happen when I’m rushing and make initial contact strike too hard. I find these hooks are really related to screen surface, perhaps related to coatings or lack of–in one of my old old tablet PCs with a hard plastic screen, it was almost impossible NOT to get them.

If I concentrate I can stop getting them, but in drawing, there are so many things to focus on at once that any help in that area is needed.

With the protector on, there’s less glare, and a lot fewer fingerprints, even though this model lacks an anti-fingerprint coating.

There is an occasional squeaking sound, but this may stop once the oils from my hands coats the whole surface. There’s less of the tapping noise that results when the Pencil meets unprotected glass. There’s now more of a soft whoosh or whisper: the “iPad Pro whisperer” perhaps.

Colors are not affected and the screen is as sensitive as before.

Lines are also unaffected by the screen protector. I zoomed in to make sure the screen protector was not subtly causing a change in the marks, then zoomed in on marks I made without the protector, but they looked the same.

Antiglare also protects your eyes, especially in bright light, more of an issue when outdoors.

As I haven’t tried other brands of screen protector with the iPad Pro, I don’t know which are best–maybe I’ll try some more.  I have tried other screen protector brands on other tablets. I think in the end the effects are similar, but the durability may be different. The Photodon seems thicker. Some screen protectors are thinner but the package contains more than one. Whatever floats your boat. Just get a good-quality, matte one.

Conclusion

Using a screen protector to draw on iPad Pro beats drawing without one. I recommend matte, not glossy, because matte is the kind that has the tooth. Glossy may provide some traction, but less.

Is it like drawing on paper? No. If you want paper, you can use something that can work with real paper, such as the Intuos Pro Paper Edition or the Lenovo Yoga Book. But using a screen protector to draw on iPad Pro is closer to drawing on paper.


digitalartposter

MDAC Mobile Digital Art & Creativity Summit

Art on the go: MDAC.org Mobile Digital Art & Creativity Summit held in Silicon Valley

by Vicky Rubin

digitalartposter

Poster done in ArtRage mobile painting app

MDAC, Mobile Digital Art & Creativity, an annual conference for digital artists who work on mobile, had its 2017 summit this month Mountain View, California, deep in the heart of Silicon Valley.

There was so much going on it was hard to take it all in–from a fascinating landscape class to a talk about drawing people from life while riding the train, to a fun, in-depth figure drawing on iPad, to animation and multimedia workshop, to learning apps such as Steller, to character design to printing. There was also a projected video art show celebrating the cultural diversity of Silicon Valley.

It was the 5th such conference. I went, had a great time, and learned a ton–there were so many programs and speakers that the two days went by faster than it takes to open an app.

The event kicked off with an art opening at the Pacific Art League of Palo Alto. Artworks were fine art paintings and photos.

These artists have made the most of this emerging medium. There were abstract, figurative, collage, landscape, you name it, under the categories of Painting, Photo, and Photo Art. Check out the winners on the MDAC site, mdac.org.

artgallery digital paintings

Digital artworks on display

All the art was created on iPads and Android or Surface tablets, or smartphones.

MIcrosoft was there with its Hololens, giving a demonstration. There were also developers from Procreate, ArtRage, Paper 53, and iOrnament, and an ArtRage artist doing live painting.

Online streaming digital art conference Sept. 16-17, 2017
But if you don’t happen to be in the Bay Area, it’s not too late. You can register for the online streaming conference on Sept. 16-17, 2017, where you’ll enjoy much of the same program as the in-person conference. Here’s the registration page.

You can also check out mobile art classes given by MDAC people at mobiart.how.

The art exhibit was followed by two action-packed days in Mountain View of conferences, talks, and classes.

Keynote speaker Daniel Leighton, an artist/filmmaker/programmer who was born with Crohn’s disease. He showed how his expressive paintings got another level of meaning when combined with Augmented Reality.

Keynote speaker Dan Ayoub from Microsoft talked about creatives can empower themselves with AI and Mixed Reality. Microsoft is including free software with the new Creator Update that will even allow kids to incorporate 3D into home movies using the Story Remix app.

There were live workshops in painting landscape, figure, and portraits. It seemed like most participants used iPad Pros.

One takeaway for me was how much apps are taking the place of what once were complex operations, such as animation. Whereas making a simple GIF was always pretty easy, making timelines and multiple layers was not. Easily mixing 3D into video is a really big step as well–it’s so simple that kids can do it. While most digital art is used for illustration and concept art, its use in fine art can be a revelation.

Check out the MDAC 2017 speakers.


ipadpro10.5

What’s new for drawing with the iPad Pro 2017?

2017 iPad Pro changes for artists

If you haven’t gotten an iPad Pro yet, you’re just in time to get the second-generation one, which has some definite advantages for artists over the first. The lineup sees the 9.7-inch model replaced with a larger 10.5-inch version. The 12.9 inch iPad Pro 2017 size remains the same.

Both have updated displays, a brand new chip, new cameras, and other improvements. The 10.5″ iPad Pro 2017 has 4GB RAM compared to the 2GB of the 9.7.”

The cameras match the iPhone 7, which is a pretty big deal. In the past, iPads were way behind iPhones in photo quality.

ipadpro10.5

iPad Pro 10.5″


Better color

Both have a wide gamut DCI-P3 display, something the old 12.9″ inch model lacked, offering only sRGB. P3 is the same system used in digital cinema. It’s similar to Adobe RGB, though with fewer greens, and it’s an improvement over sRGB. Both new models’ screens shine at a very bright 600 nits. The 9.7″ iPad Pro had two color gamuts, including P3.

Both models now also have True Tone, which first appeared with the previous 9.7″. TrueTone detects ambient light, letting the iPad change the color of the display to look best with its surroundings.

The screens are each topped with two coatings, anti-reflection and fingerprint-resistant. Less than 1.8 percent of light gets reflected, making it easier to see in sunny or bright areas. Of course, the visibility depends how bright you keep your screen.

Size and borders

The larger dimensions of the 10.5″ now allows for a full-size on-screen keyboard, as well as a full-size layout for the optional Smart Keyboard accessory. And 10.5″ is bigger than it sounds when it comes to screen real estate than 9.7.” 10.5″ is a better size for drawing than 9.7″. (I like the 12.9″ one more, but it’s a bit less easy to throw into any old bag).

The 10.5-inch model’s borders are 40% smaller than the older 9.7’s, with the tablet still weighing just over a pound. The 12.9-inch iPad Pro’s borders are the same size as the original’s. This new model has a Wi-Fi and cellular version, supporting 802.11ac Wi-Fi and LTE Advanced, a boon for digital nomads. The 12.9 weighs a mere pound and a half. Both new iPad Pros have Retina displays with a pixel density of 264ppi, which hasn’t changed from previous iterations.

ProMotion means less laggy Apple Pencil

Apple’s new ProMotion technology is enables a refresh rate of up to 120Hz, double the previous models. So drawing with the Apple Pencil is now smoother with faster tracking, cutting down latency to 20 milliseconds, while also saving power by adapting the refresh rate to match what’s viewed on the screen.

Faster graphics performance

The new models sport the A10X Fusion processor, consisting of a 64-bit six-core CPU along with a 12-core GPU with an M10 coprocessor also embedded. The company says the A10X has up to a 30 percent faster CPU and 40 percent faster graphics compared to the A9X chip. You can edit 4K video or render a 3D model quickly. While the A9X chip approached a laptop in processing power, the A10X beats out some.

iOS 11

The upcoming iOS 11 should bring welcome changes to file management and multitasking. It will become more like a Samsung Android tablet. There will be a file explorer and drag-and-drop features. (You’ll be able to put iOS11 on your older iPad Pro and some of the older non-Pros). The new operating system will being major changes and bring out the potential of the iPad Pro 2017 for artists.

Conclusion

The changes are significant, so if you’re in the market for a new tablet anyway, Apple is now doing even more to keep creatives in its ecosystem.The faster chip means you can do more with 3D and video. Art apps, especially those that let you mix colors, such as Paper by 53, will benefit from greater color accuracy.

The older iPad Pros are still fine, especially if drawing and sketching is your main interest. You’ll still be app-dependent, so if you want to run full Photoshop, you’ll need a laptop or desktop. But with mobile apps getting more and more powerful, you might start leaving your laptop at home.

See more info and reviews of the 2017 iPad Pro (Amazon)

See top styluses for drawing on iPad and Android tablets (non-Pro iPad)

See our choices for the 11 best art tablets

Read about best tablet PCs for 2017